


I Tinted My Own Eyebrows and It Was Insanely Easy
Every other month, I shell out $40 to tint my eyebrows. And every other month, I wonder: is there an easier, more affordable option? I’ve dyed my own hair with pretty great success, so shouldn’t my eyebrows be just as easy? The short answer: yes.
After I made the decision to go rogue and tint my own eyebrows, I did a ton of research. There are quite a few eyebrow kits on the market, but I encountered a few issues. It seemed like most of them had pretty bad reviews, they didn’t have the shade I needed, or they weren’t available in the US. And then I came across a few videos and blogs that suggested mustache dye, specifically Just for Men Mustache and Beard Hair Color ($8).
Feeling convinced by the results I saw in my research, I purchased a kit in the medium brown shade (there are eight shades total to choose from) and got to work. Here are the steps if you want to follow along:
STEP 1: CLEANSE
Wash the area around your brows and skip moisturizer – you don’t want anything to get in the way of that dye.
STEP 2: PROTECT
The dye will tint your skin, so you want to apply a protective barrier of Vaseline around your brows where you don’t want the dye to go. If you do get some where you don’t want it though, don’t worry, a little scrub will help it fade away.
STEP 3: MIX IT UP
The Just for Men kit comes with the hair color, developer, a mixing tray as well as an applicator brush and gloves (both of which I didn’t use). All you do it apply even amounts of color and developer onto the tray and mix it up. I actually used way too much the first time I did it, so a little will go a very long way.
STEP 4: APPLY
I used an angled eyebrow brush to apply the dye on my eyebrows. You basically just fill your brows in with the dye the same you would with a brow powder.
At this point, I want to mention that because this dye isn’t meant for this area, you’re basically applying it at your own risk. You can always do a patch test if you’re worried about having a reaction. I had a great experience, though!
STEP 5: WAIT
As soon as I finished my second brow, I set a timer for five minutes to let the color process. The dye itself started out a very light beige and then developed into a dark brown.
STEP 6: RINSE
When the time was up, I used a wet wash cloth to wipe the dye off my brows and then washed the area with my normal face cleanser.
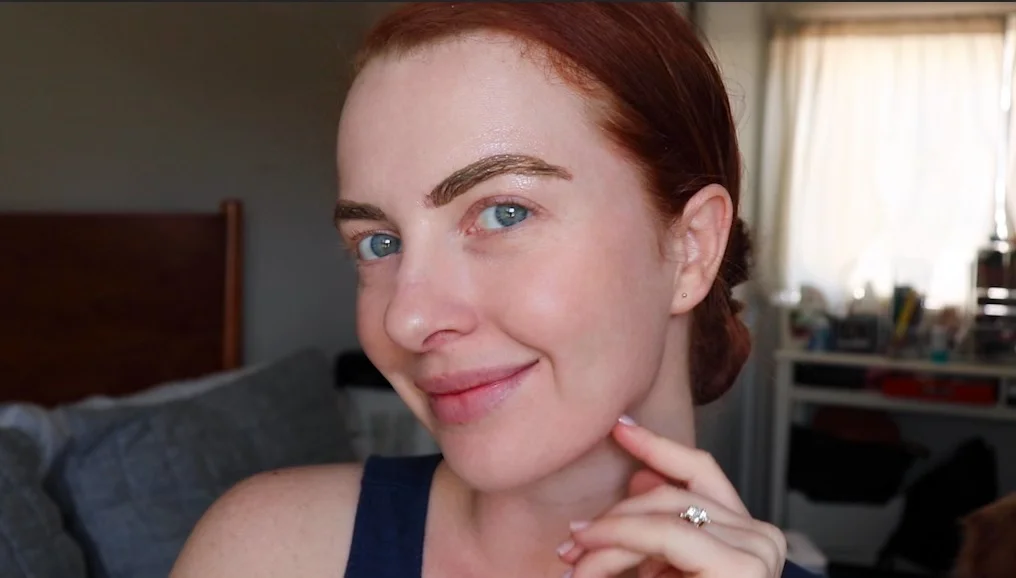
STEP 7: ADMIRE YOUR WORK
I was so impressed with how my eyebrows turned out. I picked the perfect shade for my eyebrows and I was in awe of how easy it was to do. I can’t believe I waited so long to try it out! Plus, you can’t deny how much cheaper it is to do it at home. I can use this $8 kit many times over instead of shelling out $40 every other month to have someone else to it for me.
You can watch how I did it and see my results in this video below.
Have you ever tinted your own eyebrows? Tell me what you did in the comments!